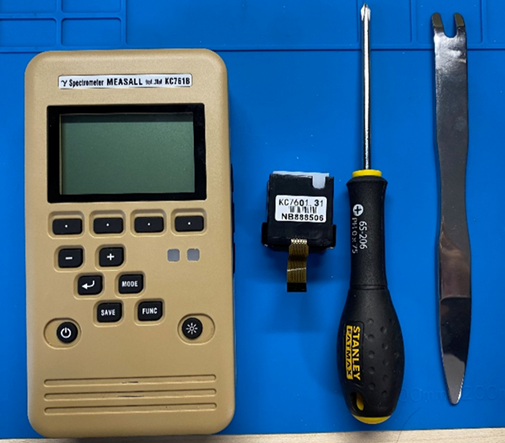
Tools Required:
PH0 screwdriver with a handle length greater than 50mm
Metal or plastic pry bar
Important Note:
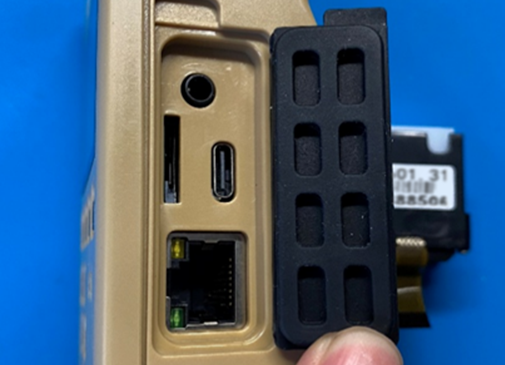
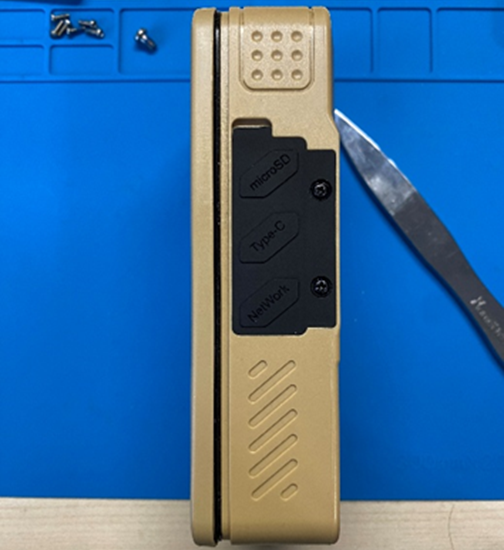
Before disassembling the KC761, ensure the TF storage card is removed. Failure to do so may result in damage to the storage card or its slot.
Step 1: Disassembling the Outer Shell
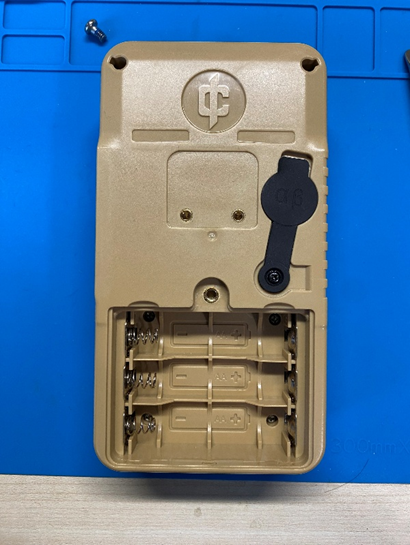
- Remove the Back Clip and Battery Cover:
Unscrew the two screws securing the back clip.
Remove the back clip and the battery cover.
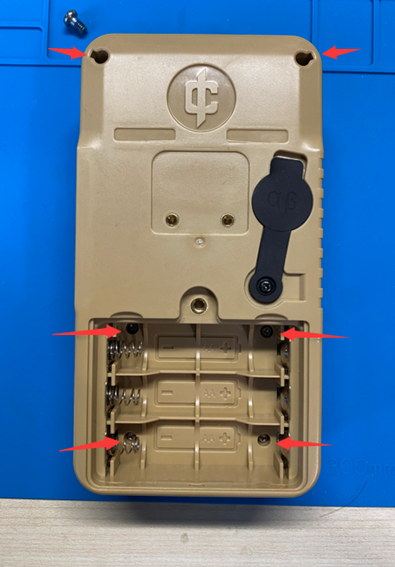
2.Remove the Outer Screws:
Unscrew the six screws securing the panel to the main body. Ensure all screws are fully loosened.
3.Separate the Panel and Body:
Use the pry bar to gently pry open the seam near the TF card slot. Carefully separate the panel from the body until the waterproof rubber ring becomes visible
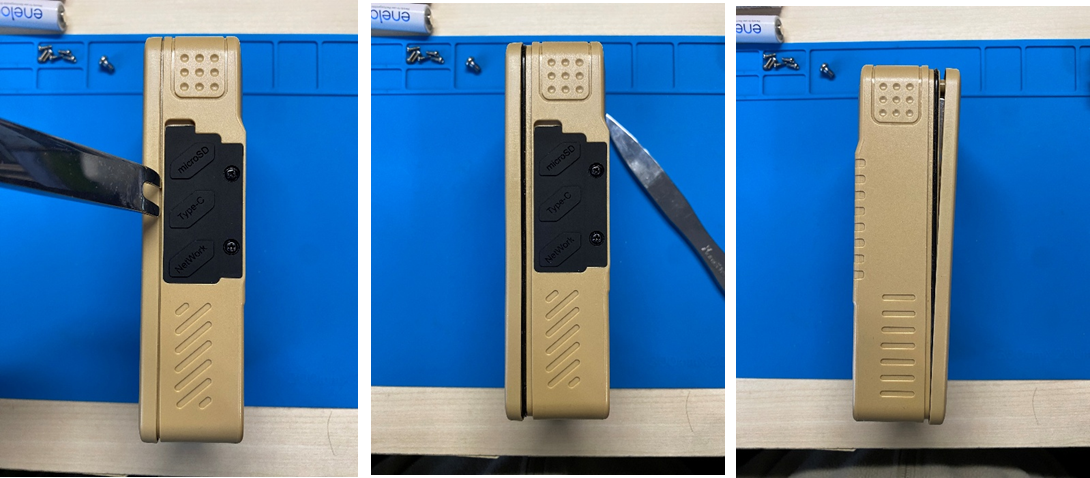
4.Fully Detach the Panel:
Continue to gently pry along the seam to loosen the panel further. Carefully detach the panel from the body while ensuring the two connecting cables remain intact.
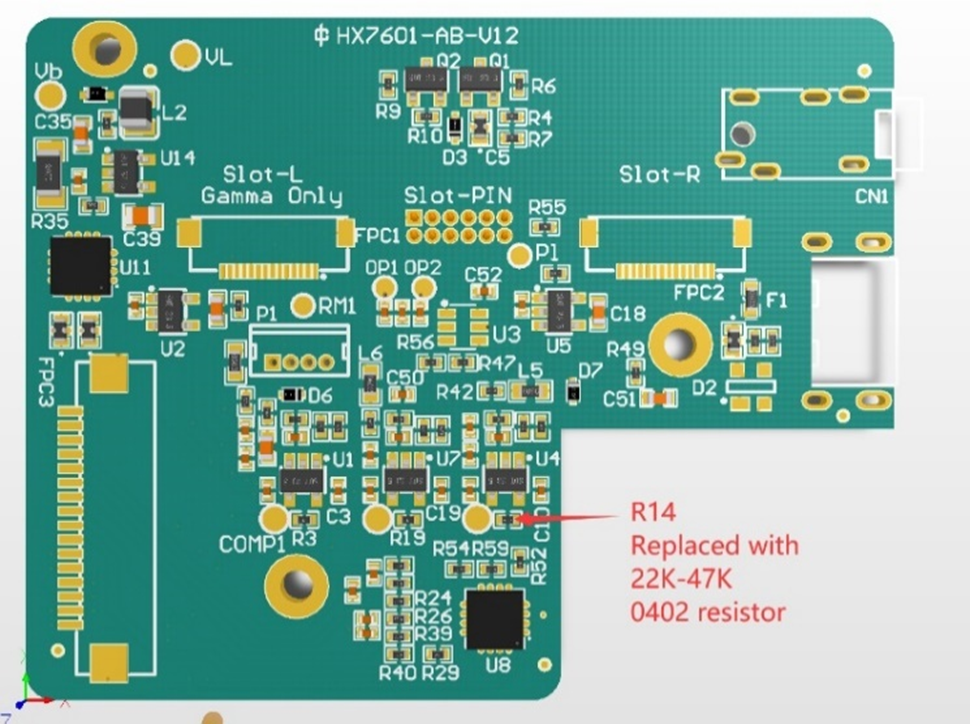
5.Special Case:
For KC761A/B shipped before April 15, 2025, it is recommended that resistor R14 on the analog signal processing board be replaced with a 47kΩ, 0402 package. After replacement the low energy gamma event will be excluded. Not to replace this resistor will only result in more flashing, particle tone and will not affect neutron flux rate and dose rate measurements.
Step 2: Installing the Neutron Sensor
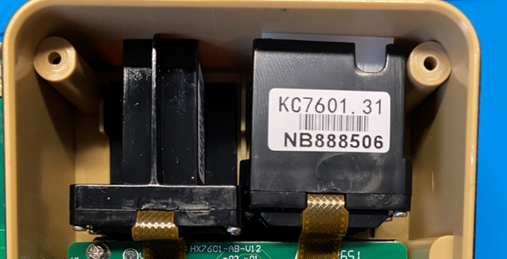
1.Locate Slot-R:
Identify the Slot-R connector on the circuit board, located to the right of the CsI scintillator slot.
2. Prepare the Connector:
Lift the connector latch on Slot-R to unlock it.
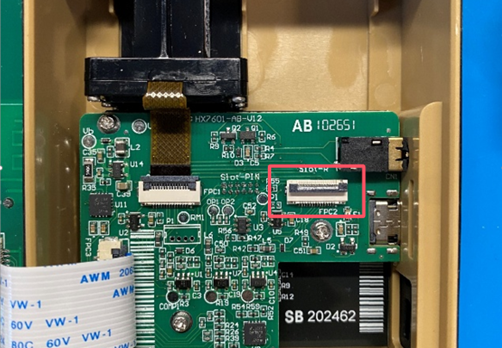
3.Connect the Neutron Sensor:
Insert the neutron sensor's cable into Slot-R. Ensure the connection is secure and correctly oriented.

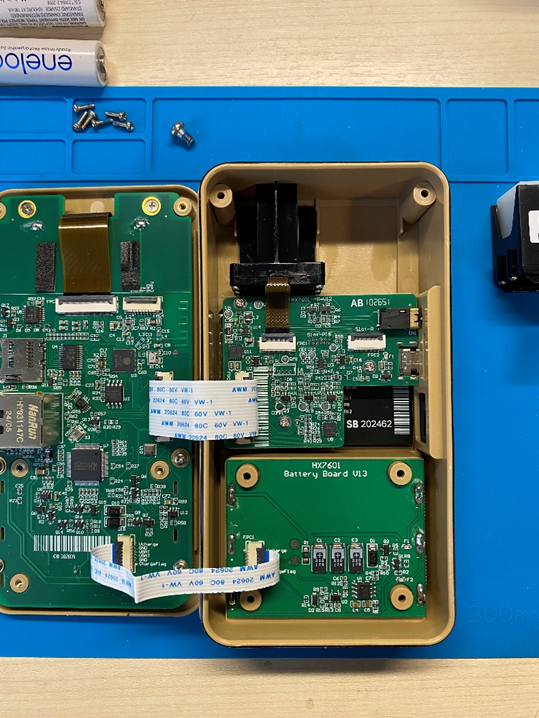
4.Position the Neutron Sensor:
Place the neutron sensor into its designated slot within the device body.
Step 3: Verifying the Installation
1. Reattach the Panel:
- Gently reposition the panel onto the body.
- Insert the battery or connect the device to a power source.
2. Power On and Test the Sensor:
- Turn on the device and press and hold the MODE button.
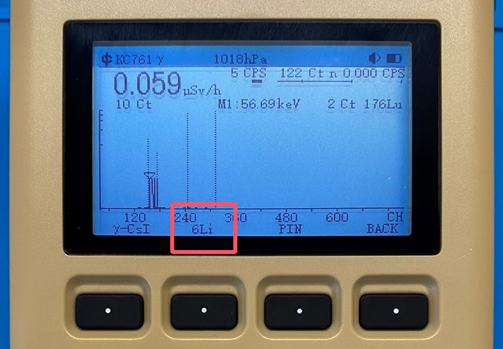
If the "6Li" option appears in the sensor selection menu, the neutron sensor is functioning correctly.
Step 4: Reassembling the Device
1.Secure the Panel:
- Firmly press the panel to ensure it is properly aligned and secured to the body.
- Check that the waterproof rubber ring is clean and remains in place without being displaced by pressure.
2.Reinstall the Screws:
- Secure the six outer screws tightly.
3.Reattach the Battery Cover and Back Clip: Replace the battery cover and back clip to complete the assembly.
Completion
The neutron sensor is now successfully installed on the KC761 device. Ensure the device is functioning correctly by navigating through the sensor selection menu and confirming the new sensor option is available.
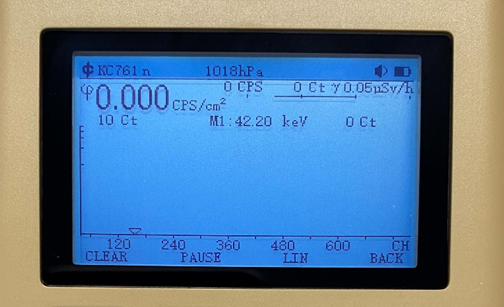
Turn on the device, long press the MODE button, select 6Li sensor, enter energy spectrum mode, and observe the count rate and dose rate readings in a daily environment. The dose rate should be essentially zero, while the count rate, based on the characteristics of background radiation, should also be zero or occasionally around 1-2 cps. In the FUNC-Reset interface, clear the accumulated dose (password 7601), return to dose mode (short press MODE, then select DOSE), and place it in a daily environment (in low-latitude regions with lower background neutron radiation) for 6 hours, ensuring that the accumulated dose is less than 0.5 μSv.